Quickly hopped out with fire extinguisher in hand, smoke is coming from the left front wheel brake. No fire just smoke but the wheel looked funny it was tilted in at the top. Looking closer under the truck discovered that the brake drum was an inch away from the backing plate and the brake shoe was showing. The smoke was coming from the paint on the brake drum which was scorched off and from grease dripping on to the drum from the hub assembly.
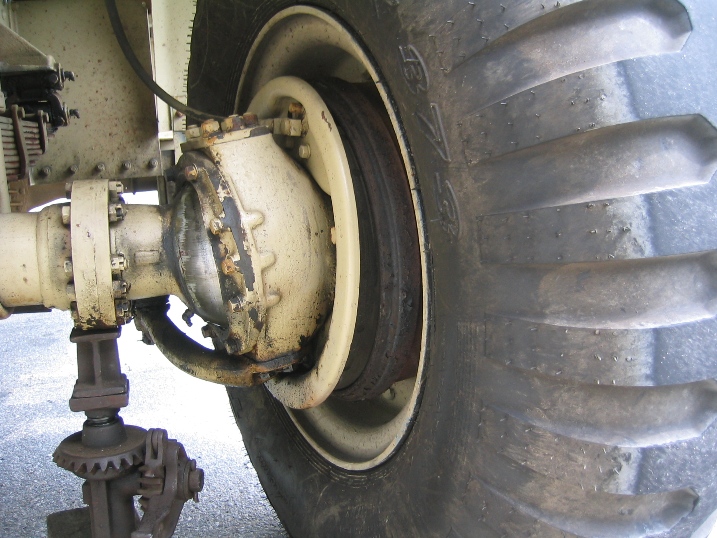
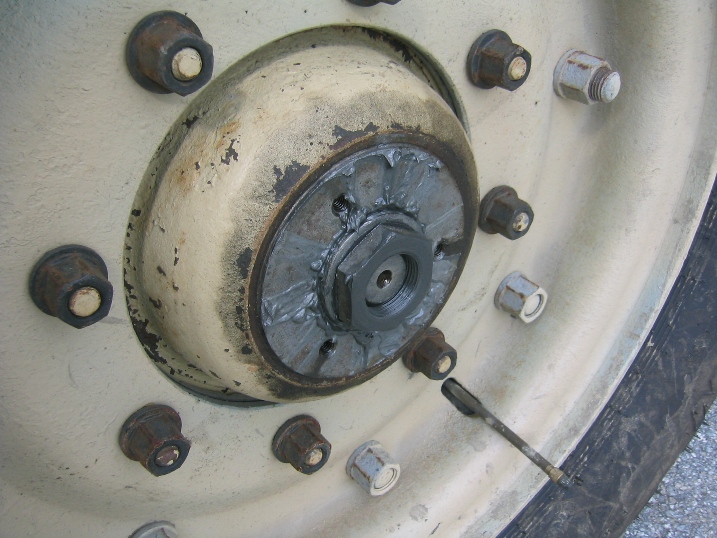
When I removed the wheel hub nut cover one nut and the nut keeper fell out, from the picture you can see that the remaining axle nut was hanging on by only a thread or two. So the answer to "How close can you come to loosing a wheel?" Very close. What had apparently caused the problem the little tooth on the nut keeper had sheared off. Later when I pull the right front hub cover the tooth on the nut keeper was also sheared off, though the nuts were still tight. (Ponder this why would the axle nuts on the left side loosen up and fall off while the ones on the right side stayed tight?)
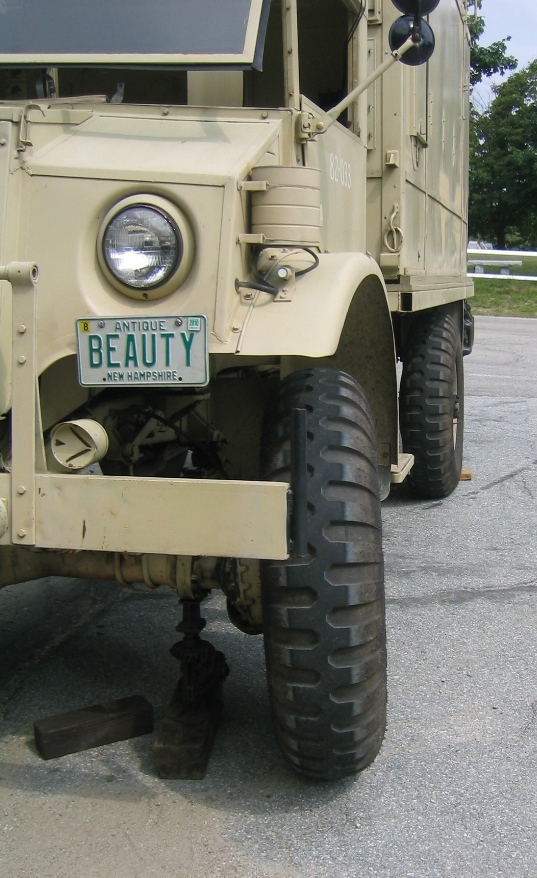
The choice then was to try and fix it where it was or call the wrecker. But first I got out the jack and placed it under the axle to take the load of the wheel and hub assembly. Then wait for the whole thing to cool down. With the knowledge what had caused the problem I headed home to get the tools to get the drum and wheel assembly back into place. Returned with full tool box plus the special tools I thought I'd need. The special tools all related to how do you pick up a 200+lbs. wheel, hub and drum assembly align it and move it back on to the hub and bearings. These special tools include a porta-power with the little spreader head and a bunch of ratchet cargo straps with this combination of tools it was possible to get the hub assembly back into proper alignment. Then the good news, once back in place and the axle nut run back in, the wheel turned easily with no grinding sounds or glitches.
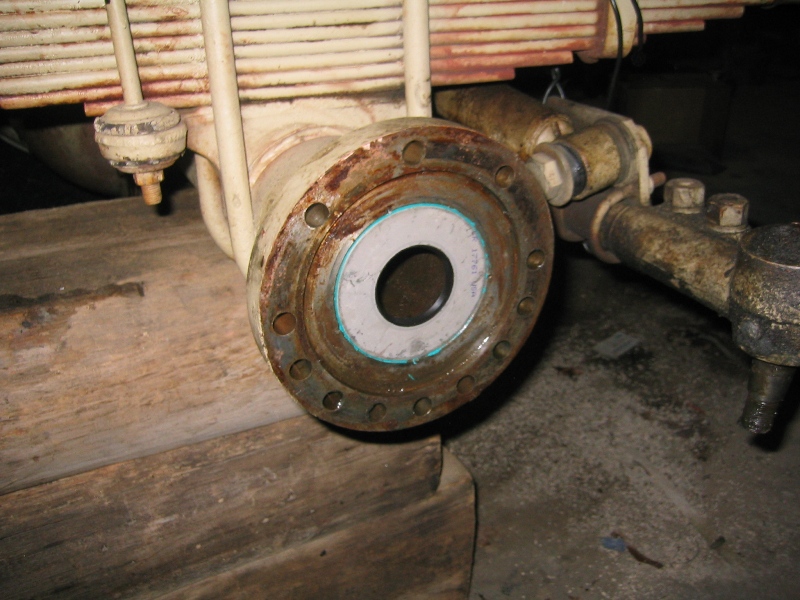
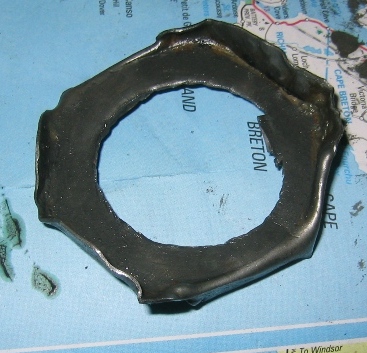
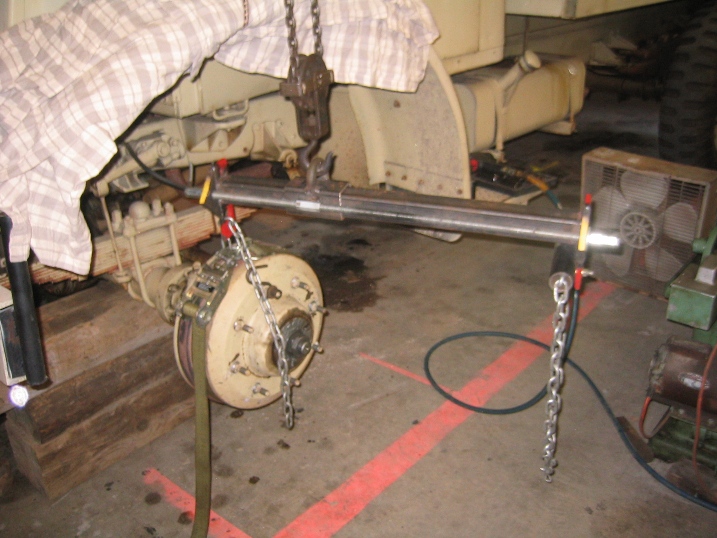
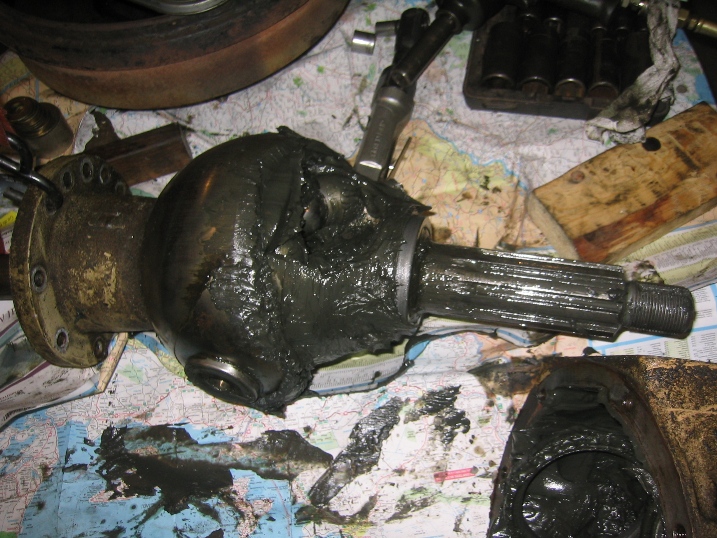
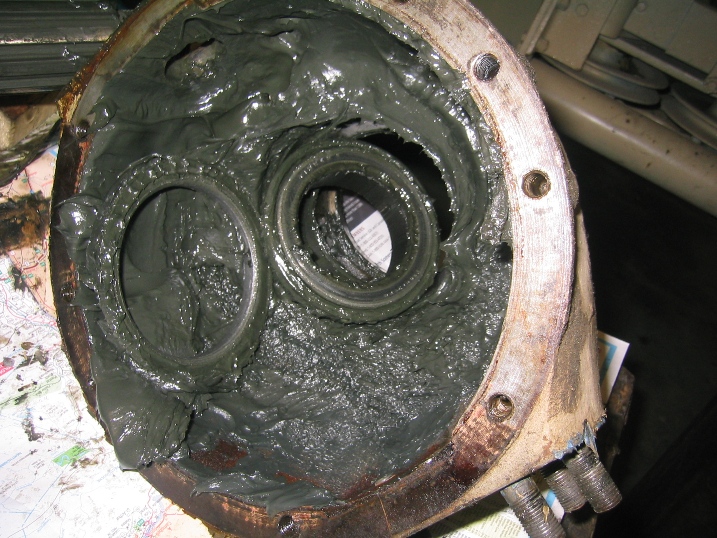
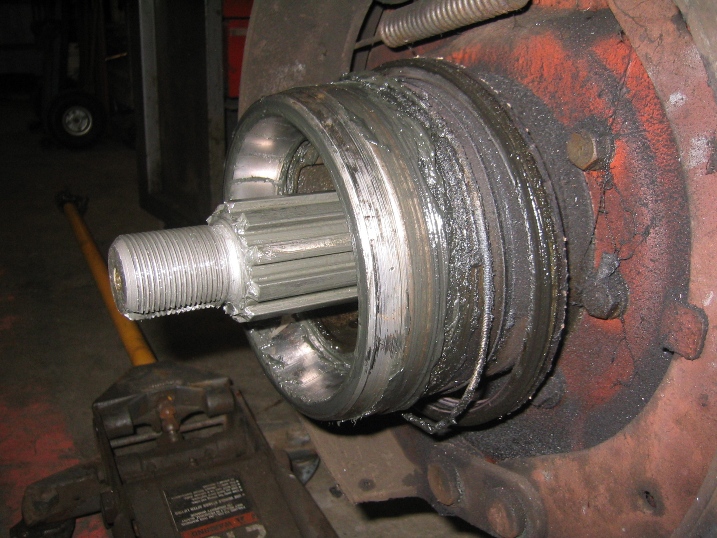
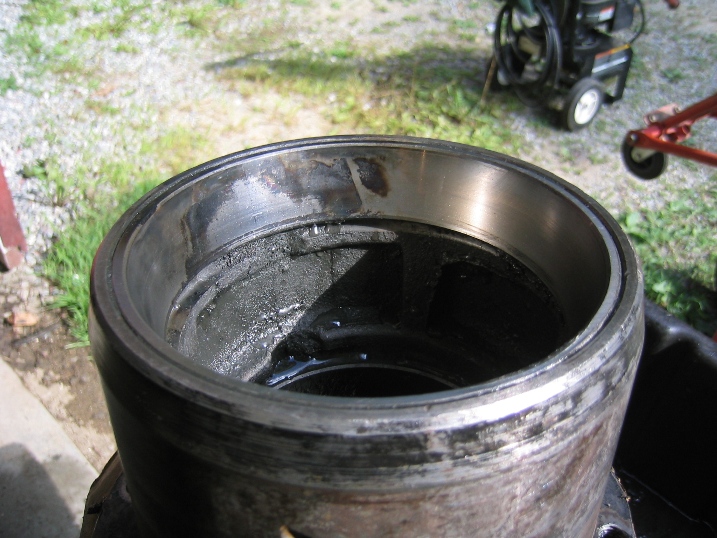
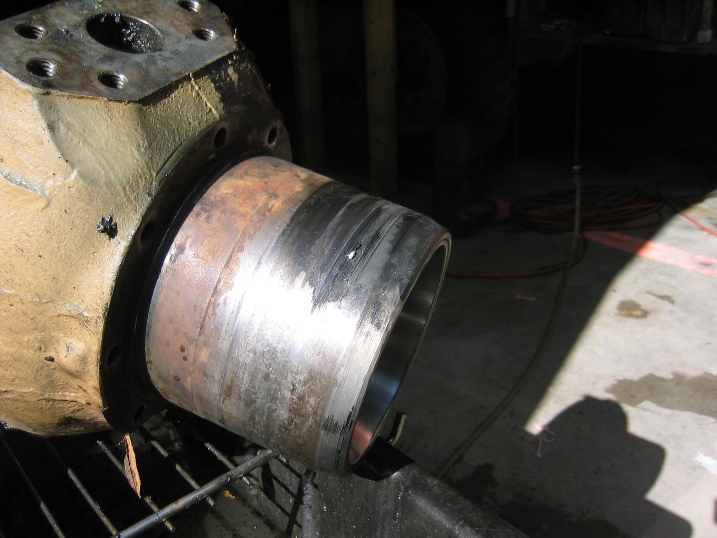
Following a careful drive home at low speed, with the truck back in the shop I knew that I had to disassemble the drive end of the axle to check for damage and to see what if anything would need to be replaced. The pictures show a little of that process of removing first the drum and hub. When the drum was removed a couple of things became clear, first the brake drum had gotten hot the paint was scorched off the drum, two all the grease from the front knuckle and wheel bearing would have to be cleaned out and replaced because of dirt from the brake drum. The grease seal had been pulled from its groove in the hub and the rubber seal itself chewed up. The wheel bearing themselves at first inspection look to have survived, but after cleaning a large amount of metal shavings was discovered along with a very nasty changed color (the bearing cup had taken on that bluish color and indication of high heat). The picture is of the outer bearing race. The heat was caused when the brake drum assembly was riding on the grease seal on the hub instead of the bearings.
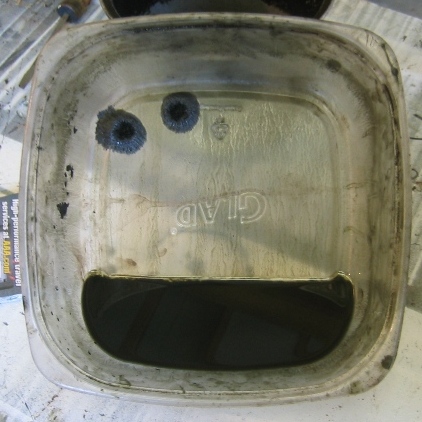
The HUB assembly is filled with about 5 lbs of grease and while it would have been interesting to dissolve the grease to see how much metal shavings had be entrapped in the grease it wasn't practical. At right is the results of cleaning just the wheel bearings. To clean all the components of grease out I first scraped out by hand as much as possible (wearing rubber gloves) then spayed all the assemblies with a biodegradable degreaser then spray washed the with 160F water.
The wheel bearings were cleaned separately with magnets under the plastic container to capture any steel particles as can be seen below
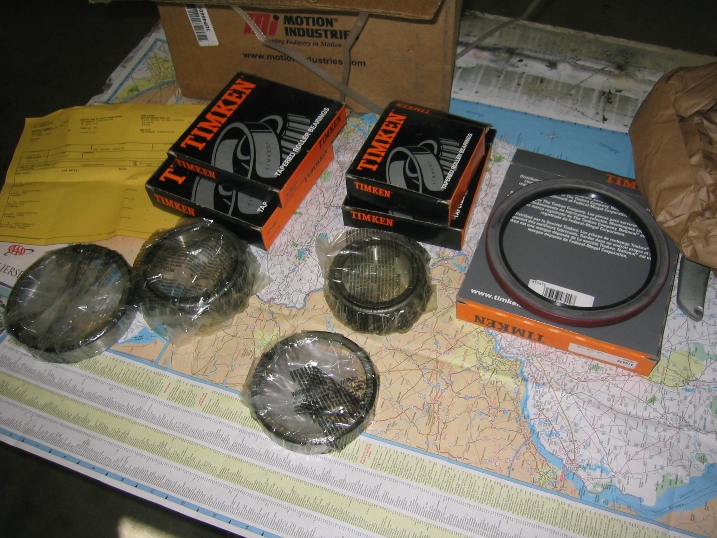
Now for the good news all of the bearings and seals are readily available from Motion Industries who have a web site http://www.motionindustries.com typed in the original Timken part numbers from the bearing, yes all numbers are still good after 60+ years, parts information with all the dimensions come up to confirm they are correct. Called the local branch they gave me a substantial discount of the list price from the web and confirmed all parts in stock and 3 day shipping. Total cost of bearing and seals for damage done to the left hub $259.30 add in an extra set of seals to check the other side and the total was $325.54 which I don't think is bad.
Parts Invoice
Qty Description Requested Date Prices are US Dollars
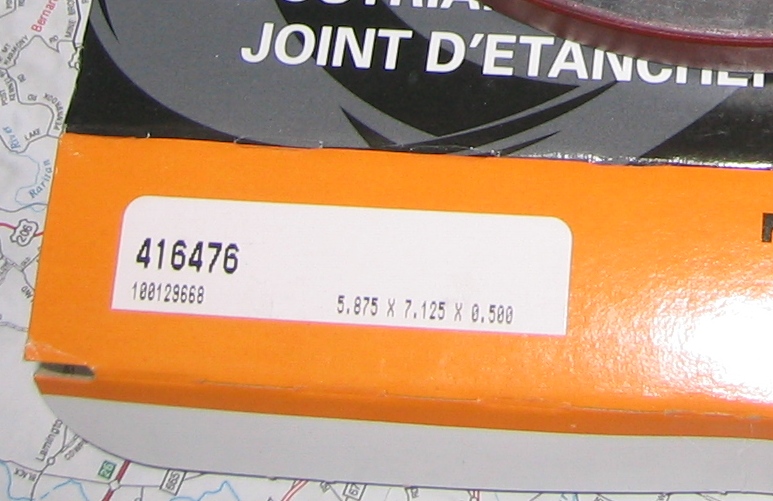
1.0 NATIONAL S 416476 OIL SEAL 09/01/2009 Brake Drum Grease Seal Price............: $ 52.34
1.0 TIMKEN 47620 CUP 09/01/2009 Outer Cup Price............: $36.84
1.0 TIMKEN 33462 CUP 09/01/2009 Inner Cup Price............: $27.25
1.0 TIMKEN 33275 CONE 09/01/2009 Inner Cone or Wheel Bearing Price............: $ 56.32
1.0 TIMKEN 47687 CONE 09/01/2009 Outer Cone or Wheel Bearing Price............: $71.93
SUBTOTAL 244.68
FREIGHT* 0.00
TOTAL** $ 244.68
2.0 C-R 17761 OIL SEAL 09/09/2009 Axle shaft seal at the flange plate
Price............: $ 28.52
1.0 NATIONAL S 416476 OIL SEAL 09/09/2009 Price............: $ 52.34
SUBTOTAL 80.86
FREIGHT* 0.00
TOTAL** 80.86
Total Cost of Parts (so far) $ 325.54
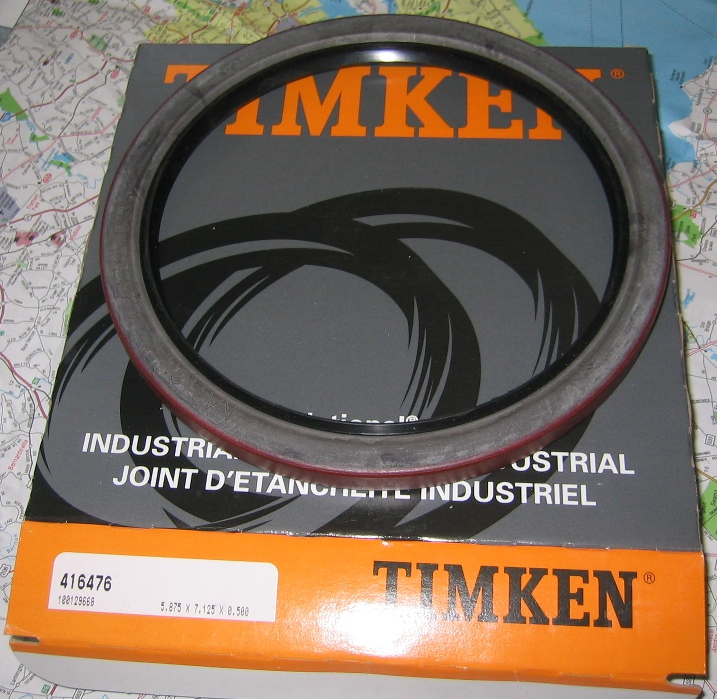
These are the modern replacement for the original front drum seals, before ordering confirm the dimensions to be sure they will fit your drums. These seals are narrower than the original but seam to work fine. Be sure that the hub surface the seals runs against is smooth. If your hub is badly scored there are speedie sleeves that will fit over the damaged area to provide a new sealing surface. Though I have not used speedie sleeves in this application, I have used them with great success in a number of other areas on CMPs such as engine front and rear main seal areas on the crank, much cheaper than having the crank reground. Have also used them in transfer case and and rear end.
Below and at right are the inner axle seal, these are often damaged when the axle is being installed because it is difficult to hold the axle shaft off the seal while you insert the axle end into the differential. However these seals are really not that important as long as the truck is not going to be operated on steep side slopes. At angles up to about 10 Degrees the gear lub in the differencial is not running out the housing to reach this point. So the seal body is acting more as a dam than as a true seal.